DWS 4026 How to Upgrade Firmware XMODEM
Requirements:
- PC / Laptop / MAC
- DWS-4026 Firmware – Download from our site – Click here
- Terminal Emulator – Click here
- RS232-USB – Console Cable
Once you have the above completed, please continue to “Environment Setup”
Environment Setup:
Step 1 – Open Tera Term and setup as follows:
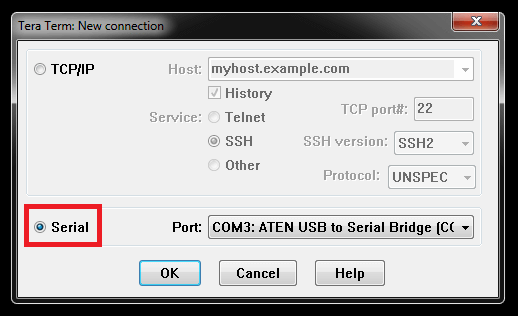
Click to select “Serial” - (In our example, we have used COM3) – Check your environment to what COM port is used.
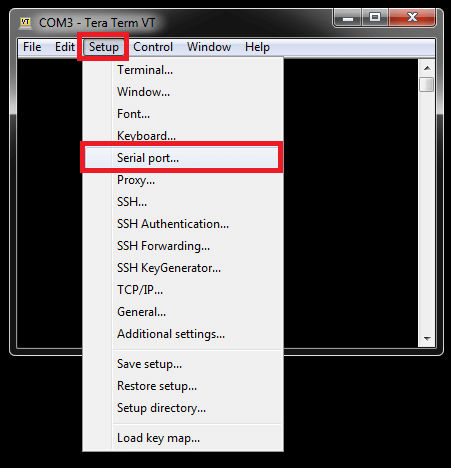
Select - Setup > Serial port…
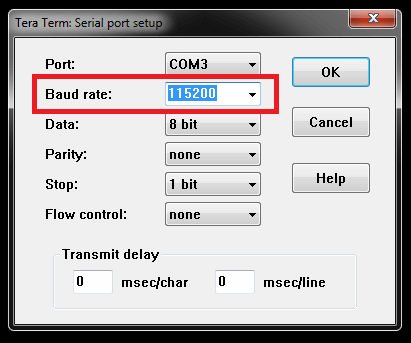
Baud rate: 115200
Once selected as above, click “OK”
XMODEM Procedure:
Step 2 – Login to your switch
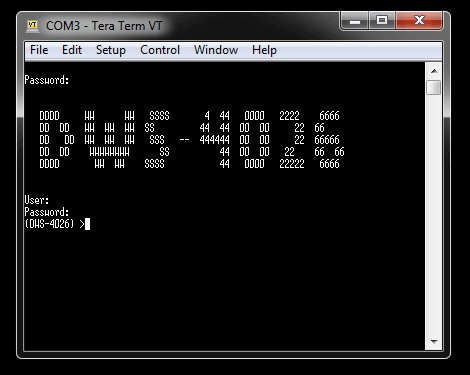
Once you have logged into the switch, enter the following command:
(DWS-4026) >enable
You will be asked for the password, enter this and hit enter key and you should have elevated permissions. Then enter the following commands:
(DWS-4026) #reload – this is to reboot system
Are you sure you would like to reset the system? (y/n) y
System will now restart!
1 - Start operational code.
2 - Start Boot Menu.
Select (1, 2):2 (Enter 2 for: Start Boot Menu)
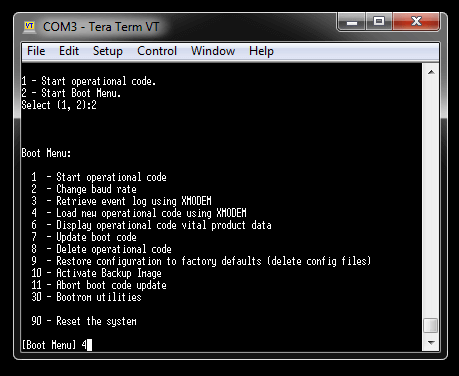
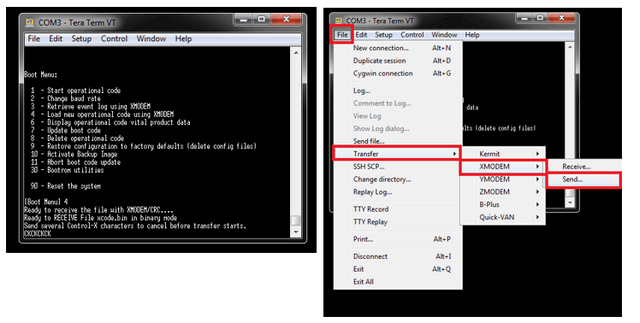
[Boot Menu] 4 (Enter 4 for: Load new operation code using XMODEM)
XMODEM will commence the process, however you will need to search for the firmware that was downloaded prior to this step
Step 3 – Select the firmware file to transfer
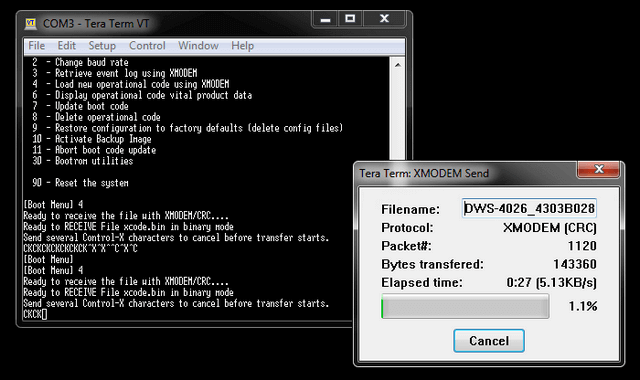
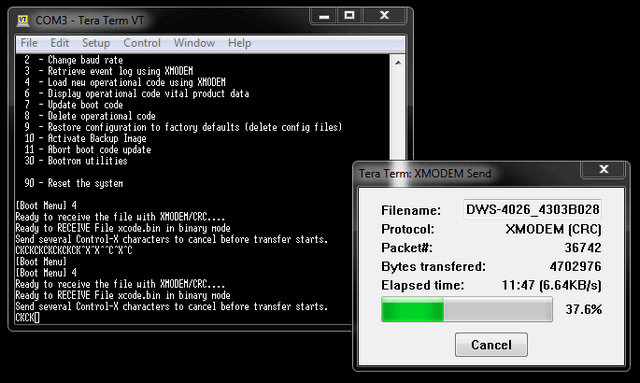
File > Transfer > XMODEM > Send – Search for the firmware and click “OK” to begin the transfer…
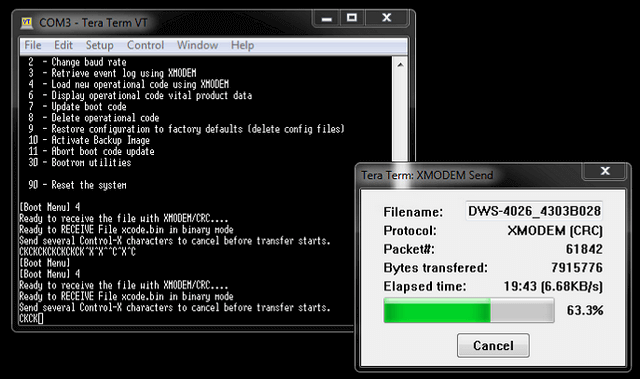
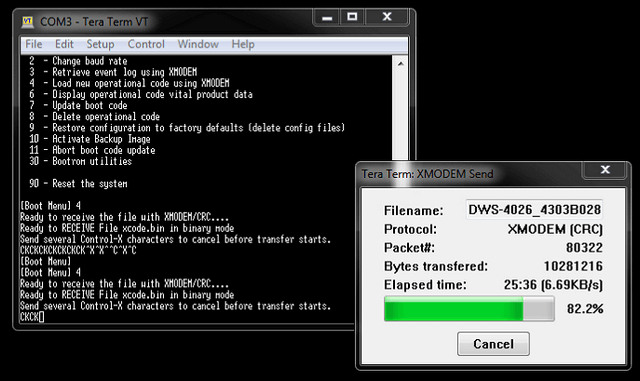
Step 4 – Transfer in progress… this may take up to 30 minutes. Please wait for this to complete.

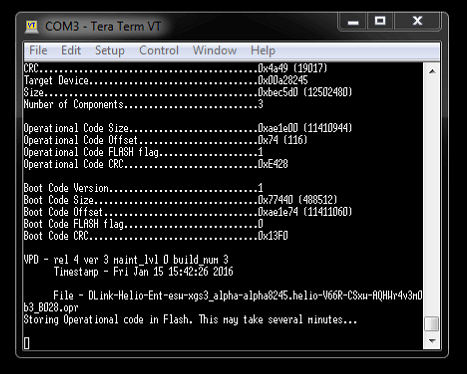
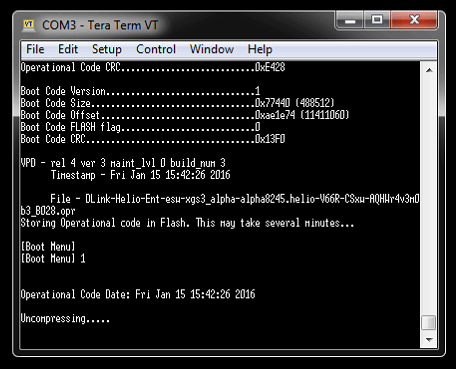
Step 5 – Storing Operation code in Flash…
Step 6 – Start Operation code…
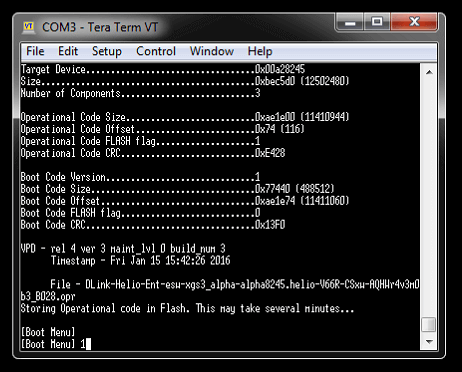
[Boot Menu] 1 – Select 1 to reboot switch…
Step 7 – Firmware upgraded and ready to login

Step 8 – To confirm the firmware version enter the following commands:
(DWS-4026) >enable
Password: {enter your password}
(DWS-4026) #show version
Software Version............................... 4.3.0.3_B028
Or
(DWS-4026) #show bootvar
Images currently available on Flash
--------------------------------------------------------------------
unit active backup current-active next-active
--------------------------------------------------------------------
1 4.3.0.3_B028 <none> 4.3.0.3_B028 4.3.0.3_B028
(DWS-4026) #
- PC / Laptop / MAC
- DWS-4026 Firmware – Download from our site – Click here
- Terminal Emulator – Click here
- RS232-USB – Console Cable
Once you have the above completed, please continue to “Environment Setup”
Environment Setup:
Step 1 – Open Tera Term and setup as follows:
Click to select “Serial” - (In our example, we have used COM3) – Check your environment to what COM port is used.
Select - Setup > Serial port…
Baud rate: 115200
Once selected as above, click “OK”
XMODEM Procedure:
Step 2 – Login to your switch
Once you have logged into the switch, enter the following command:
(DWS-4026) >enable
You will be asked for the password, enter this and hit enter key and you should have elevated permissions. Then enter the following commands:
(DWS-4026) #reload – this is to reboot system
Are you sure you would like to reset the system? (y/n) y
System will now restart!
1 - Start operational code.
2 - Start Boot Menu.
Select (1, 2):2 (Enter 2 for: Start Boot Menu)
[Boot Menu] 4 (Enter 4 for: Load new operation code using XMODEM)
XMODEM will commence the process, however you will need to search for the firmware that was downloaded prior to this step
Step 3 – Select the firmware file to transfer
File > Transfer > XMODEM > Send – Search for the firmware and click “OK” to begin the transfer…
Step 4 – Transfer in progress… this may take up to 30 minutes. Please wait for this to complete.
Step 5 – Storing Operation code in Flash…
Step 6 – Start Operation code…
[Boot Menu] 1 – Select 1 to reboot switch…
Step 7 – Firmware upgraded and ready to login
Step 8 – To confirm the firmware version enter the following commands:
(DWS-4026) >enable
Password: {enter your password}
(DWS-4026) #show version
Software Version............................... 4.3.0.3_B028
Or
(DWS-4026) #show bootvar
Images currently available on Flash
--------------------------------------------------------------------
unit active backup current-active next-active
--------------------------------------------------------------------
1 4.3.0.3_B028 <none> 4.3.0.3_B028 4.3.0.3_B028
(DWS-4026) #
Ceci peut également aider.
- How to Find the IP Address via Console - DWS-4026 Lire la réponse