With Secure DNS enabled, the public DNS information will be encrypted with DNS-over-HTTPS (DoH), instead of being transferred in plaintext. That is, the DNS queries and responses become unreadable by attackers, ISPs or anybody able to monitor the transmissions, thus attackers won’t be able to forge or tamper with the DNS traffic. It surely protects people’s privacy in terms of security and, in some cases, human rights. If DNS queries are not private, then it becomes easier for attackers to censor the Internet and stalk users' online behavior.
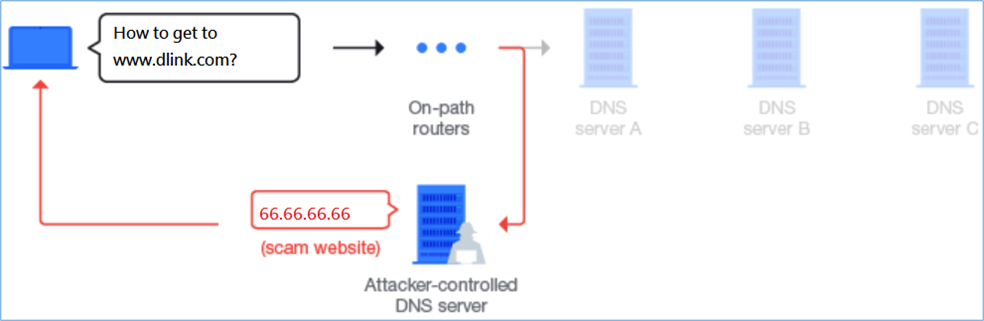
Most popular websites nowadays use HTTPS to encrypt connections and protect sensitive information such as passwords, credit card info, and Internet bank logins. However, DNS queries are still sent in plaintext. For example, if you enter www.dlink.com into your browser, it will contact (often multiple) DNS servers to ask for the IP address associated with the domain name.

Since the queries are in plaintext, any DNS servers that are contacted (like your ISP’s) plus any routers on the path to those DNS servers would be able to figure out which sites you’re visiting. Moreover, attackers can also tamper with the response and possibly redirect you to a scam website.
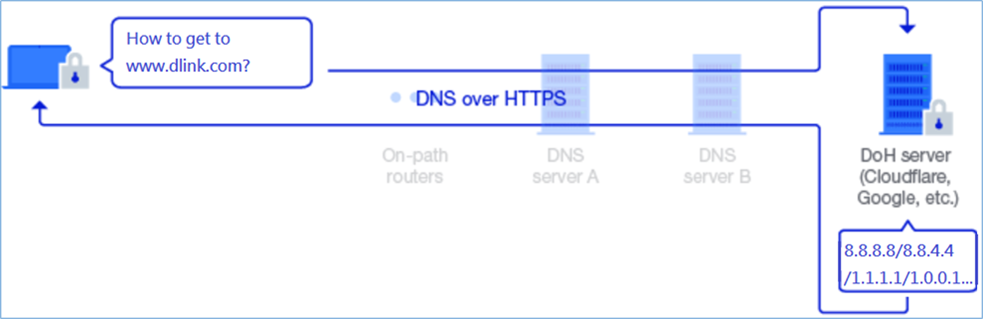
With the Secure DNS (DNS-over-HTTPS) feature coming into play, all DNS queries and responses are encrypted so that only clients and the selected DoH server know which sites are browsed. It effectively stops outsiders from snooping on clients’ online behavior and all probable forges.
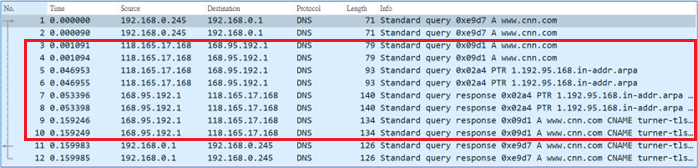
DNS queries and responses in plaintext via UDP packets (Secure DNS is disabled):
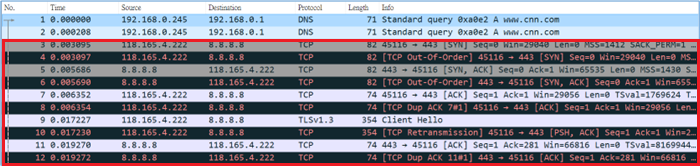
Encrypted DNS queries and responses (Secure DNS is enabled):
To enable the Secure DNS feature, please follow the instructions below:
Step 1: Connect your PC to the router via the Ethernet cable or Wi-Fi, and then log in to the router’s management page.
Step 2: Click Setting -> Internet.
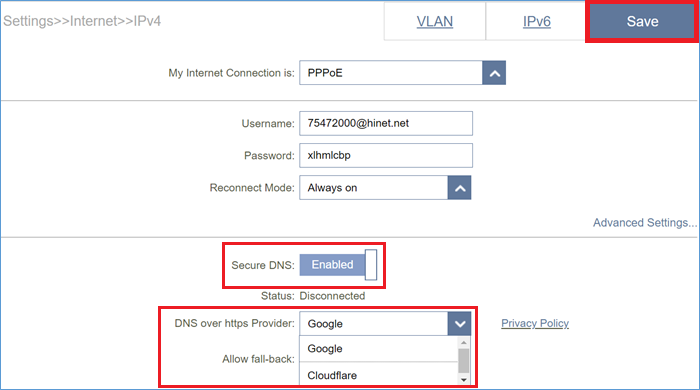
Step 3: Enable Secure DNS and select either Google or Cloudflare from the DNS over HTTP Provider drop-down list. Then, click Save to apply the settings.
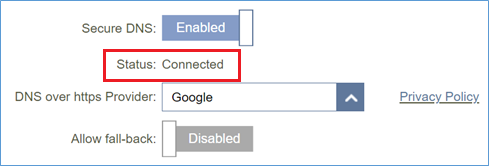
Step 4: Make sure the Status becomes Connected after configuring it, which indicates that the DNS server has been changed from the Primary/Secondary DNS server to the selected Secure DNS server.
Note: If selecting either the Google or Cloudflare Secure DNS server, the Primary/Secondary DNS server will be bypassed.