How to Setup Security with DHCP Server Screening – DGS-1210-Series
DHCP Server Screening
The DHCP Server Screening option allows us to provide a higher level of security to our network at all times knowing who our DHCP server on the network. This allows us to rule out any other packets from any DHCP server that can be serving IP addresses and to avoid a security issues. This may be due to we could be getting an IP from a different range with re-sending packets to another gate-way that could be capturing traffic. This could also be a simple mistake that someone connected another router or APs with DHCP server enabled and would result in IP conflicts and network is-sues.
• Before starting the setup you need to know the IP address of your router or gateway.

Step 1 - To begin configuring enter the IP address of the switch, the default switch IP 10.90.90.90 available if the IP has been modified and no longer remember need to perform a reset to factory defaults team.
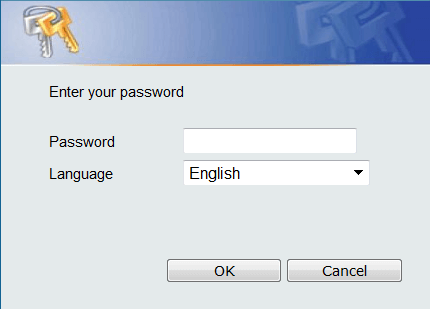
Step 2 - Use your browser to access the web interface, the default IP address is 10.90.90.90
( http://10.90.90.90 ) And the default password is admin.

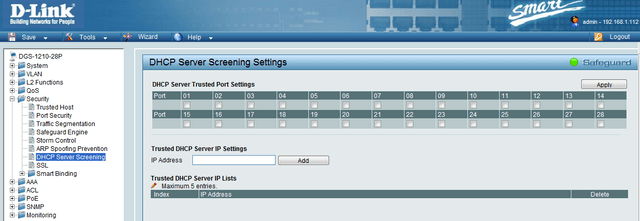
Step 3 -Enter the configuration of the switch, click in the left-hand side menu on Security, then DHCP Server Screening.

Step 4 - Here you can configure the port to where the DHCP server and network segment will be. In our case our DHCP server is connected to port 1.
We un-select all other ports to any other router or computer with an active DHCP and config-ure the IP Trusted Server in DHCP Server IP Settings.

Step 5 – Click “Add” to add the server to the list of trusted DHCP servers..

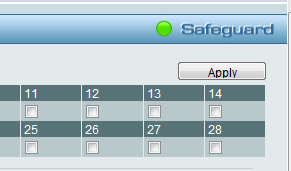
Step 6 - Click “Apply” to apply the changes.

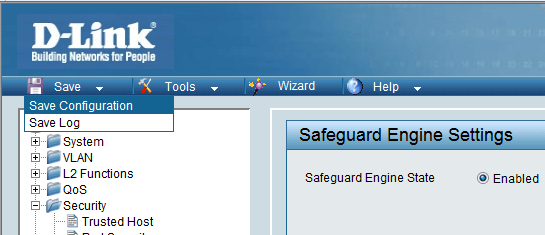
Step 7 - Once the configuration has been saved, click “Save” then “Save Configuration” to save your settings.

The DHCP Server Screening option allows us to provide a higher level of security to our network at all times knowing who our DHCP server on the network. This allows us to rule out any other packets from any DHCP server that can be serving IP addresses and to avoid a security issues. This may be due to we could be getting an IP from a different range with re-sending packets to another gate-way that could be capturing traffic. This could also be a simple mistake that someone connected another router or APs with DHCP server enabled and would result in IP conflicts and network is-sues.
• Before starting the setup you need to know the IP address of your router or gateway.
In our case we verify this information in our Router DSR-1000N.

Step 1 - To begin configuring enter the IP address of the switch, the default switch IP 10.90.90.90 available if the IP has been modified and no longer remember need to perform a reset to factory defaults team.
Step 2 - Use your browser to access the web interface, the default IP address is 10.90.90.90
( http://10.90.90.90 ) And the default password is admin.

Step 3 -Enter the configuration of the switch, click in the left-hand side menu on Security, then DHCP Server Screening.

Step 4 - Here you can configure the port to where the DHCP server and network segment will be. In our case our DHCP server is connected to port 1.
We un-select all other ports to any other router or computer with an active DHCP and config-ure the IP Trusted Server in DHCP Server IP Settings.

Step 5 – Click “Add” to add the server to the list of trusted DHCP servers..

Step 6 - Click “Apply” to apply the changes.

Step 7 - Once the configuration has been saved, click “Save” then “Save Configuration” to save your settings.

Ceci peut également aider.
- $name Lire la réponse
- How to Prevent ARP Spoofing - DGS-1210-Series Lire la réponse
- $name Lire la réponse
- $name Lire la réponse
- $name Lire la réponse
- $name Lire la réponse
- $name Lire la réponse
- $name Lire la réponse
- $name Lire la réponse
- How to Setup - Asymmetric VLAN with a Corporate and Guest Network – DGS-1510-Series Lire la réponse
- How to Configure VLANs – Example (HTTP and CLI) DGS-1510-Series Lire la réponse